Building configurations
Applications that rely on Taipy Core need to define
a Configuration where the data flow is
described.
This configuration can be coded in Python and tuned using environment variables
(as described in the
advanced configuration
section).
Taipy Studio provides ways to design graphically Taipy application configurations. Within the Visual Studio Code environment, you can create configuration elements (for Data Nodes, Tasks, and Scenarios), specify the properties for those elements, and use a visual representation of those configuration elements as a graph.

Taipy Studio stores those configurations in TOML files. These files can be used at runtime by Taipy applications as described in the note on Studio.
Introduction
Taipy Studio has a dedicated panel called Taipy Configs, where almost everything happens. To open this panel, use the "View > Open View..." menu option and search for the view called "Taipy Configs".
The view appears like this:
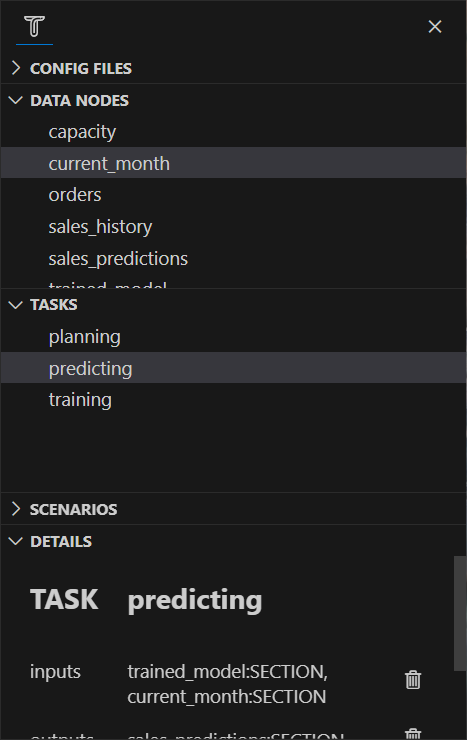
This panel is split into several sections that let the user access all the configuration elements:
- Config Files: holds a list of configuration files (
*.toml) that exist in the project.
The user can select a configuration file in this list to populate the other sections of the Taipy Configs view. - Data Nodes: holds the list of
Data Node configurations defined
in the selected configuration file.
The user can select a Data Node configuration in this list to access all its properties in the Details section (see below). - Tasks: holds the list of
Task configurations defined
in the selected configuration file.
The user can select a Task configuration in this list to access all its properties in the Details section (see below). - Scenarios: holds the list of
Scenario configurations defined
in the selected configuration file.
Each Scenario configuration element may contain sequences that appear as child nodes of the scenario element.
The user can select a Scenario configuration in this list to access all its properties in the Details section (see below). - Details: When a configuration element is selected, the Details section displays all the properties of this configuration element and allows the user to modify these properties.
Using these different sections, you can add, rename, or remove configuration elements, as well as change their properties in the "Details" section.
All your actions impact the selected configuration file; you can use Visual Studio Code's undo/redo feature if needed.