scenario_selector
Select scenarios from the list of all scenario entities.
The scenario selector shows all the scenario entities handled by Taipy Core and lets the user select a scenario from a list, create new scenarios or edit existing scenarios.
Properties
| Name | Type | Default | Description |
|---|---|---|---|
|
Scenariodynamic |
Bound to the selected |
|
show_add_button |
bool |
True | If False, the button to create a new scenario is not displayed. |
display_cycles |
bool |
True | If False, the cycles are not shown. |
show_primary_flag |
bool |
True | If False, the primary scenarios are not identified with specific visual hint. |
on_change |
Callback |
The name of a function that is triggered when the value is updated. |
|
height |
str |
"50vh" | The maximum height, in CSS units, of the control. |
show_pins |
bool |
False | If True, a pin is shown on each item of the selector and allows to restrict the number of displayed items. |
on_creation |
Callback |
The name of the function that is triggered when a scenario is about to be created.
|
|
show_dialog |
bool |
True | If True, a dialog is shown when the user click on the 'Add scenario' button. |
id |
str |
The identifier that will be assigned to the rendered HTML component. |
|
class_name |
strdynamic |
The list of CSS class names associated with the generated HTML Element. |
(★)value is the default property for this visual element.
Details
The scenario selector displays a tree selector where scenarios are grouped based on their cycle
(if the property display_cycles has not been set to False).
If the show_primary_flag property has not been forced to False, the
label of the primary scenario are overlaid with a small visual hint that lets users spot them
immediately.
If no created scenario has been created yet, the tree selector will appear empty. The default behavior, controlled by the show_add_button property, is to display a button letting users create new scenarios:
When the user presses that button, a form appears so that the settings of the new scenario can be set:
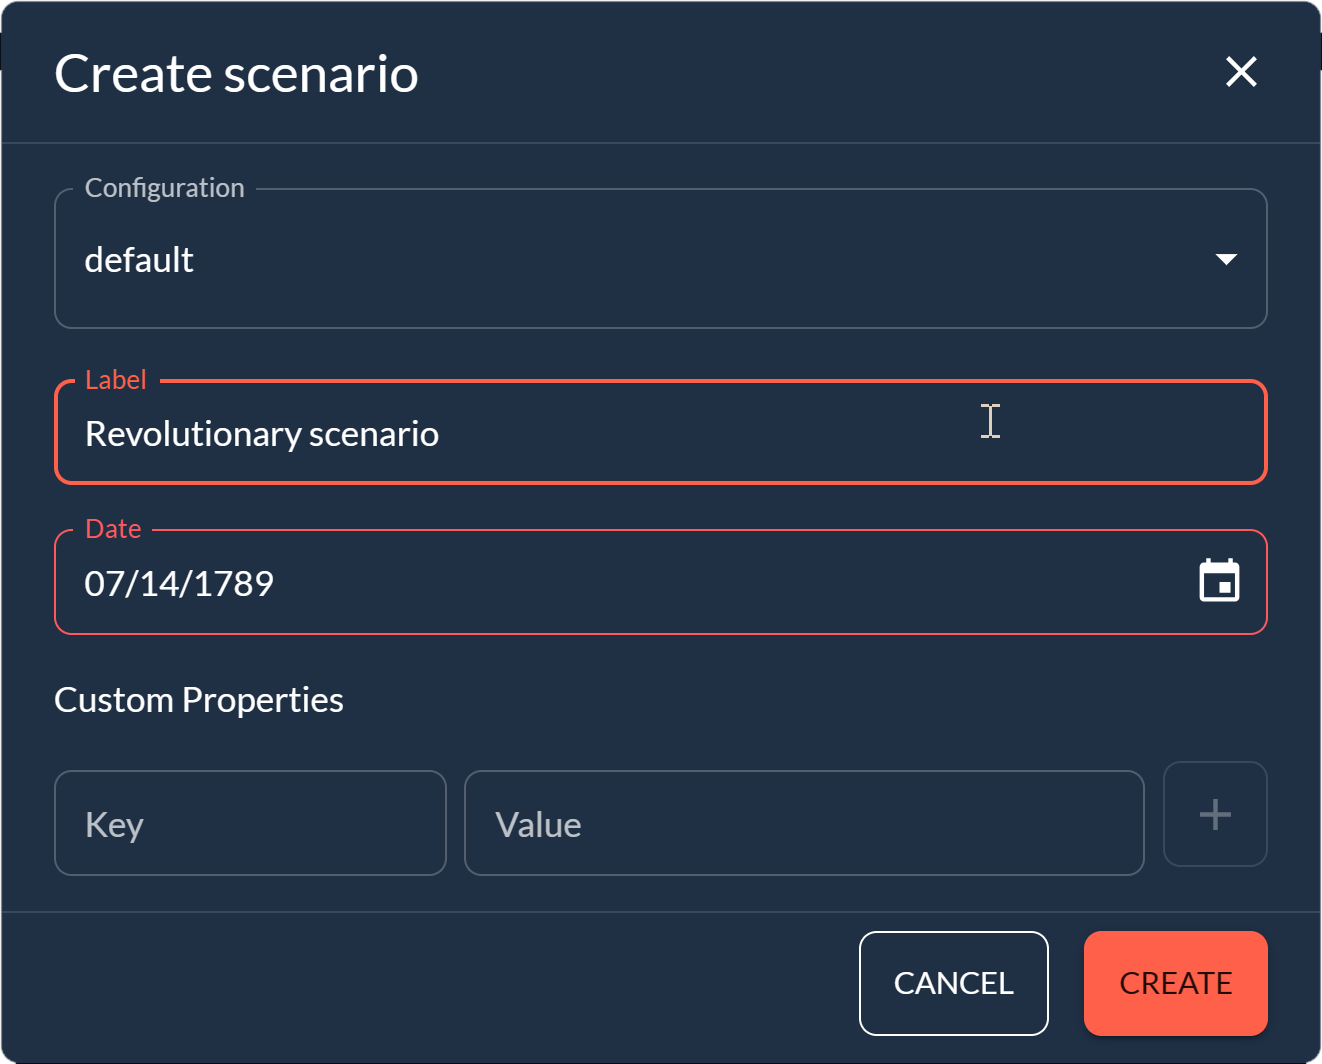
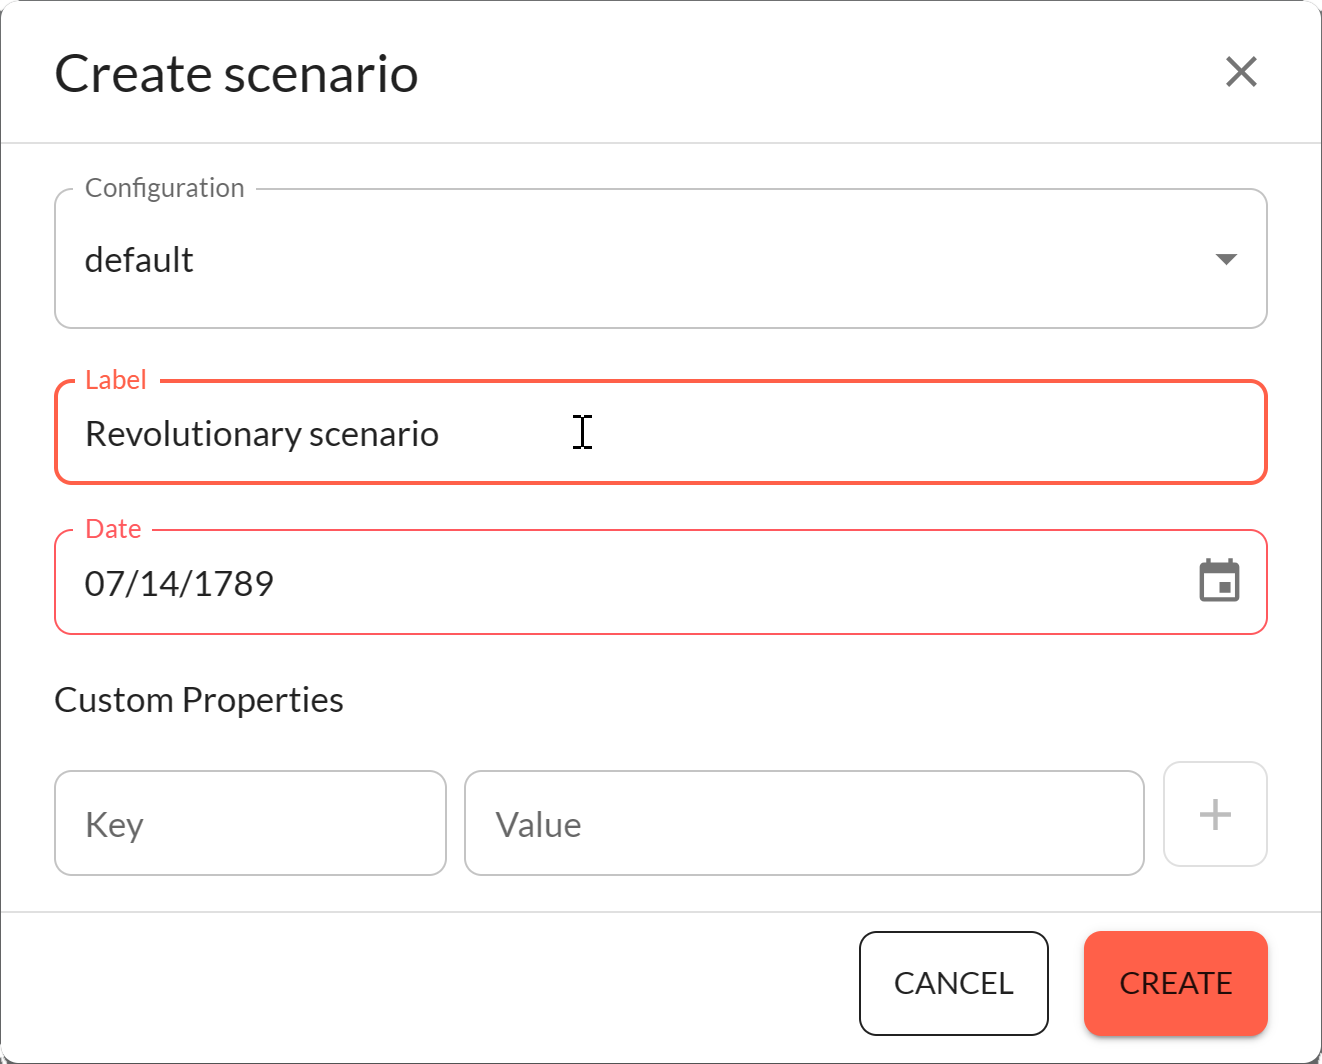
In this form, the user must indicate which scenario configuration should be used and specify the
scenario creation date.
Custom properties can also be added to the new scenario by pressing the '+' button located on the
right side of the property key and value fields.
When several new scenarios are created, the scenario selector will list all the scenarios, potentially grouped in their relevant cycle:
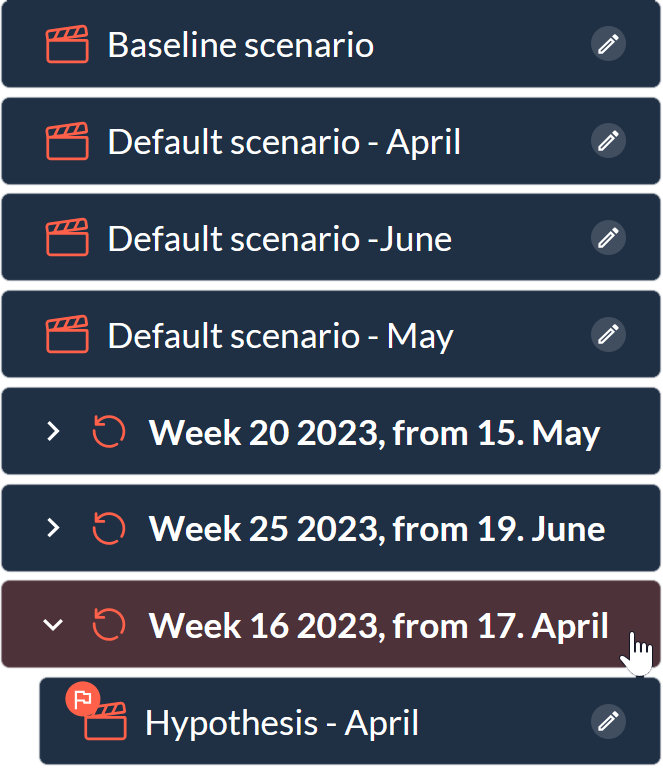
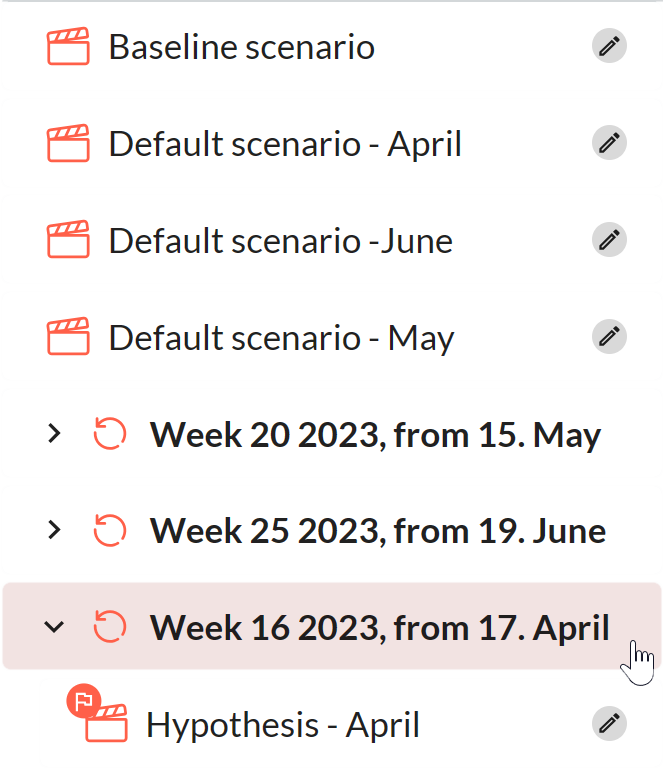
Notice how the primary scenario for a cycle is immediately flagged as "primary" (you may choose not to show that icon by setting the show_primary_flag property to False).
Editing a scenario
Users can press the pencil icon located next to the scenario labels. When that happens, a dialog box similar to the scenario creation dialog is displayed to let users modify the scenario settings.
Here is how this dialog box looks like:
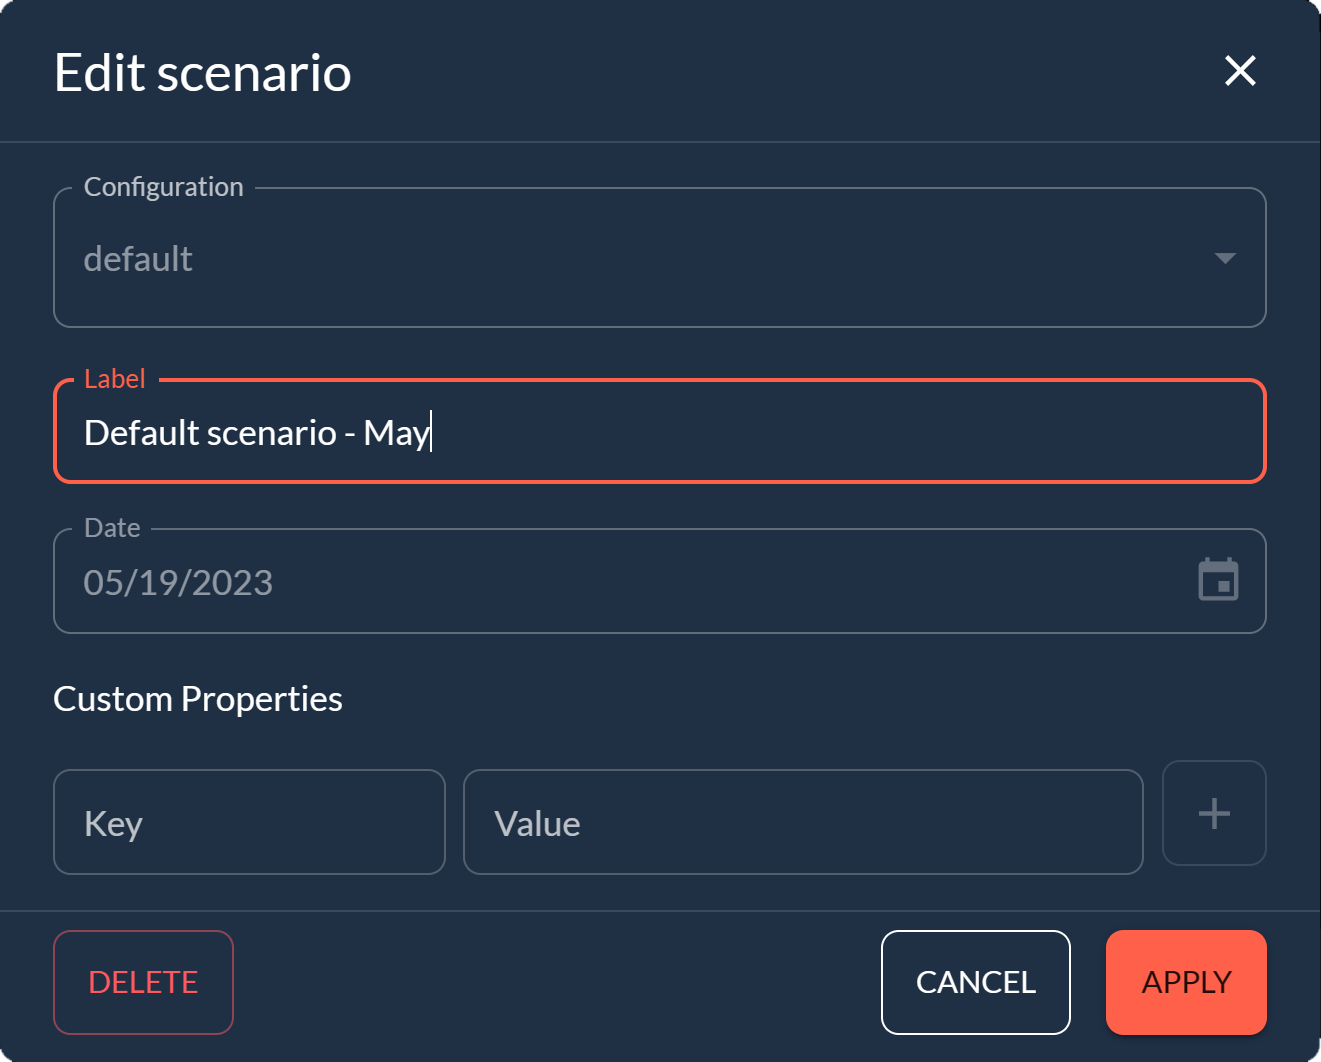
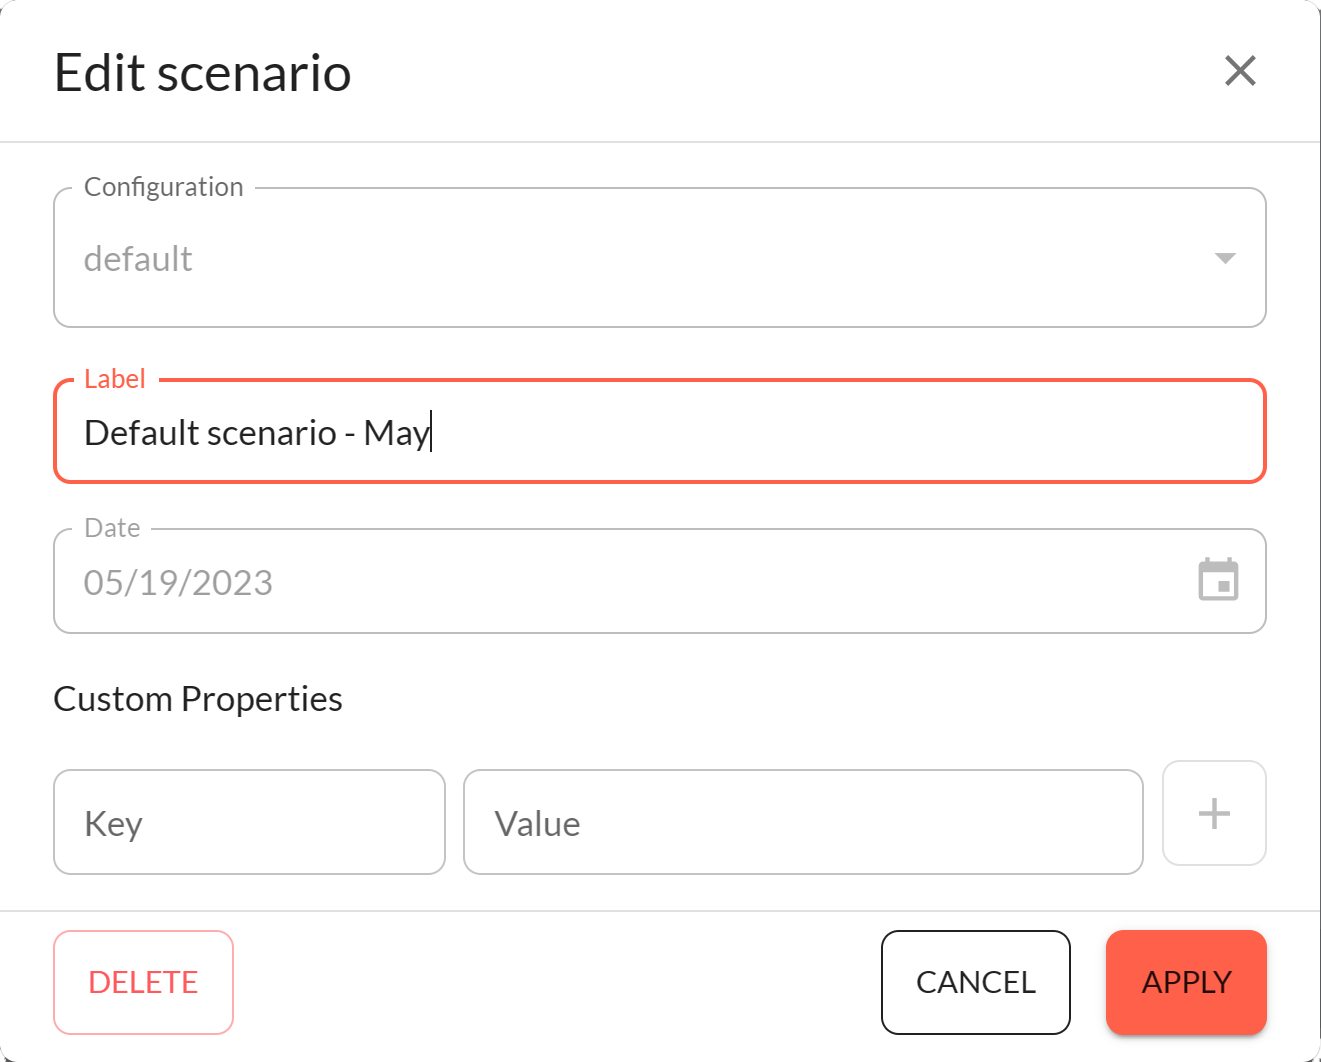
The user can change the scenario label and custom properties then press the 'Apply' button to
propagate the changes.
To add a new custom property, the user has to fill the 'Key' and 'Value' fields in the 'Custom
Properties' section, then press the '+' button.
A custom property can be removed by pressing the trash button next to it.
The 'Cancel' button closes the dialog without changing anything.
The 'Delete' button deletes the edited scenario.
Note that there is no way to change the scenario configuration or its creation date.
Selecting a scenario
When the user selects a scenario in the tree selector, the value property is set to the selected entity and the on_change callback is invoked. The application can then use the selected value.
If no scenario is selected, value is set no None.
Usage
Customizing the creation
You can set the on_creation property to a callback function that lets you customize how a new scenario is created when pressing the 'Add Scenario' button.
This callback function expects three parameters:
- state: the
Stateof the user; - id: the identifier of the control, if any;
- payload: a dictionary that contains the following keys:
- action: the name of the callback function;
- config: the
ScenarioConfigthat was selected in the dialog; - date: a
datetime.datetimeobject representing the date and time when the creation was requested; - label: the scenario label as specified in the dialog. This string is used as the scenario name;
- properties: a dictionary that contains all the custom properties that the user has defined in the creation dialog.
The payload parameter contains all the information that is needed to create a new scenario. In the callback function, you can use these parameters to customize the new scenario creation further.
- If all those parameters look just fine in terms of what needs to be achieved, the callback
function can simply return None. That will get Taipy to carry on with the scenario creation with
no customization whatsoever.
That is the default behavior of ascenario_selectorcontrol that has no value in its on_creation. - If the parameters (typically the custom property keys or values) are invalid in the application's context, you may want to refuse the creation of the scenario. In this case, the callback function should return a string that provides visual feedback to the user (or an empty string if this is not needed).
- You can also create the scenario in the function callback and return it. This is the opportunity to change the scenario creation parameters to fit the application's needs.
Here is an example of a creation callback function that deals with these three situations.
Imagine that the application, if the user has added the "index" custom property to a scenario,
needs to check that the property value is valid and transform it before the scenario is actually
created.
In our example, we expect the user to set a positive integer value to the property "index". The
code will check that the value is valid and replace it with a string representation of this value
minus one, prefixed with the sharp ('#') sign.
Here is the code for the creation callback function:
1 2 3 4 5 6 7 8 9 10 11 12 13 14 15 16 17 18 19 20 21 22 23 | |
When the user requests the creation of a new scenario, the creation dialog pops up. When fields
are properly set (only the label is mandatory), the user will press the 'Create' button to confirm
the scenario creation.
At this time, the application will invoke the creation callback to customize the scenario
parameters.
Lines 4-7 deal with the case where the index custom property was not set. In this case, we want to do nothing special and carry on with the regular creation of the control, returning None from the callback function.
Line 9-18 verify that the index custom property is a valid integer greater than one. If this is not the case, an error message is returned to the user for correction.
Finally, lines 20-22 take care of creating the scenario with the new settings.
This scenario is returned by the callback function to let Taipy know it was created properly.
The scenario selector control definition needs to have the on_creation property set to the function:
Definition
<|{scenario}|scenario_selector|on_creation=check_index|>
<taipy:scenario_selector on_creation="check_index">{scenario}</taipy:scenario_selector>
import taipy.gui.builder as tgb
...
tgb.scenario_selector("{scenario}", on_creation=check_index)